
For information on finding high-quality, legal images to use in your portfolio, see our guide on finding images.
Working with Images in Digication
 You may have noticed that many Digication pages have a banner or header image at the top of every page. The banner image can give your ePortfolio a unique identity, reflecting some important aspect of yourself or your work. Digication has some particular rules about the size of banners, which may make it difficult to make your page look the way you want it to. We recommend using an image that is at least 779 pixels wide, as this is the maximum supported width. It's generally better to work with larger images, as they can be resized without losing image quality.
You may want to first upload the image you want to use as your banner to Digication just to see how it looks without heavy image editing. If you're working with a large image, Digication might choose the portion of the image you want to use (don't count on it, though).
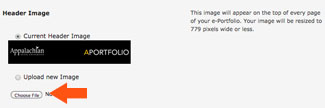
From any page on your e-portfolio, you can click Portfolio Tools, and then Settings. Scroll down to Choose A Theme, and select Customize. Under Header Image, select Upload new image and click Choose File. Now locate on your computer the picture you want to use for your banner. Click OK and be sure to scroll all the way to the bottom of the page to Save your changes.
After saving your changes, you should see the image you just uploaded at the top of your Digication page. If you don't like the way it came out, continue reading, and we will figure out how to create a suitably sized banner. We'll be using the website Pixlr, a free in-browser photo editor, to manipulate your image.
Creating a Banner using Pixlr Express (Efficient)
Digication allows a maximum banner size of 779x200 pixels, so that's the size we'll use in this tutorial (although you can create a smaller one if you like).
Step 1 | From Pixlr Express, click Browse to locate photos on your computer, or Open URL to find images saved online. | 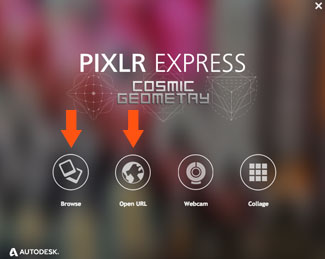 |
|---|---|---|
Step 2 | Once the image has loaded, click the Adjustment icon, then select Resize. | 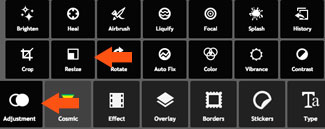 |
Step 3 | To keep the proportions of the picture and avoid stretching the image, delete the numbers in the Width box and replace them with the number "779." The Height will automatically resize to maintain the correct proportions (do not change it). Click Apply to keep the settings. |  |
Step 4 | Now click Adjustment, then choose Crop. | 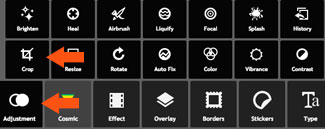 |
Step 5 | To keep the proportions of the newly resized image, delete the numbers within the Height category and enter in the number "200." The numbers in the width category should not change (keep it at 779). This will create a box that shows the correct dimensions for a Digication banner. Move the box until you have included the elements of the picture you want to appear on your banner. When you are satisfied with the banner image, click Apply. | 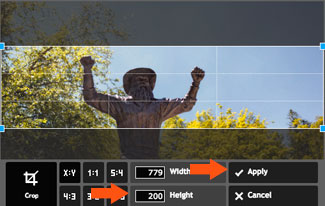 |
Step 6 | You can even add text by using the Type tool. Select your Font and enter your text in the box on the bottom left. You can select the font, size, and color of the text you want to include using the options in the center and on the right. When you are done adding and adjusting the text, click Apply. | 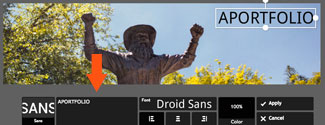 |
Step 7 | If you're satisfied with your banner, click Save in the upper left corner of the editor, then choose a file name and location to save it to your computer. | 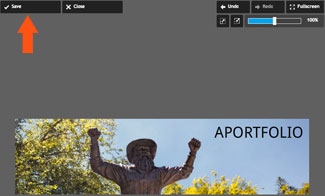 |
Step 8 | Upload your new banner image to Digication using the steps outlined in the "Working With Images in Digication" section above. | 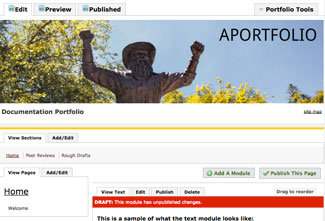 |
If you have questions about Aportfolio, email us at aportfolio@appstate.edu