
This tutorial will show you how to add captions to images within your Aportfolio.
Step 1 | To add a caption to your image hover over the image you want to caption. A bar of options will appear at the top right of the image. | 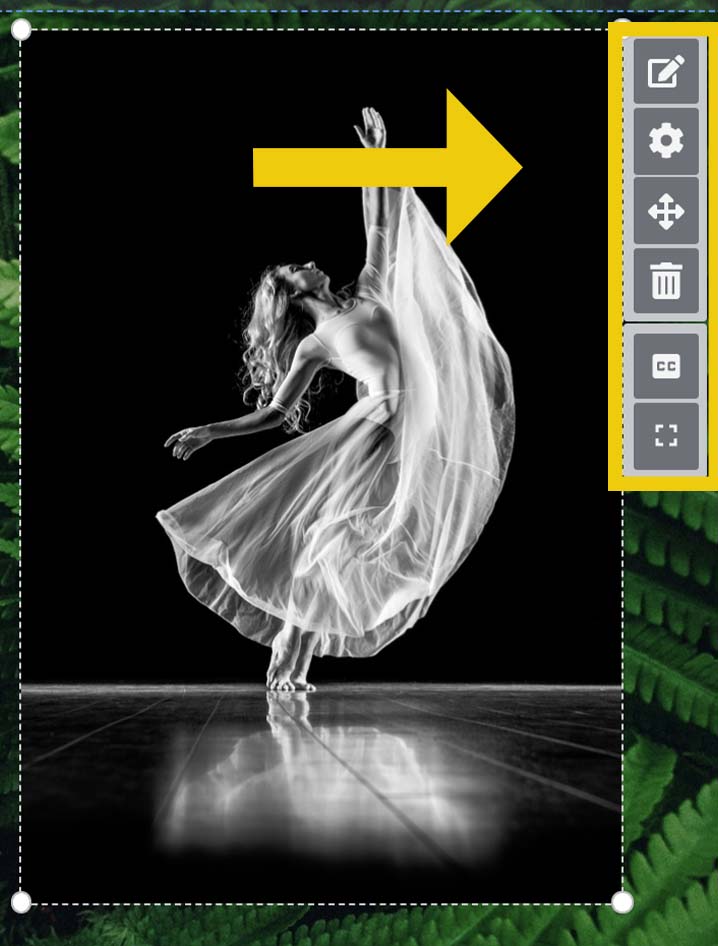 |
|---|---|---|
Step 2 | Click on the Caption icon to turn on captions. | 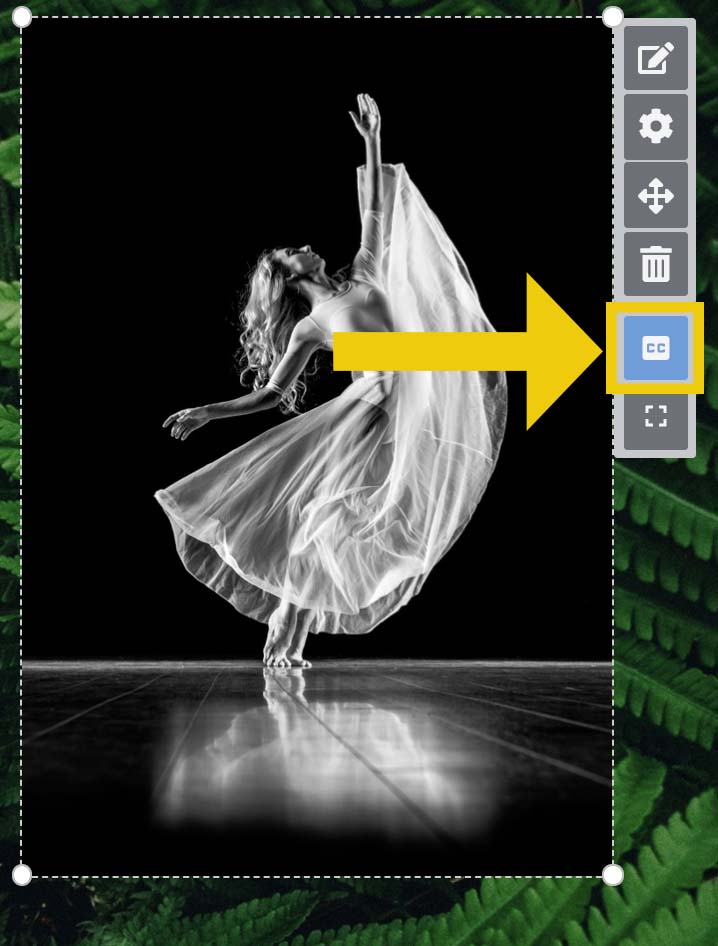 |
Step 3 | Click on the Edit icon and choose Edit Caption. | 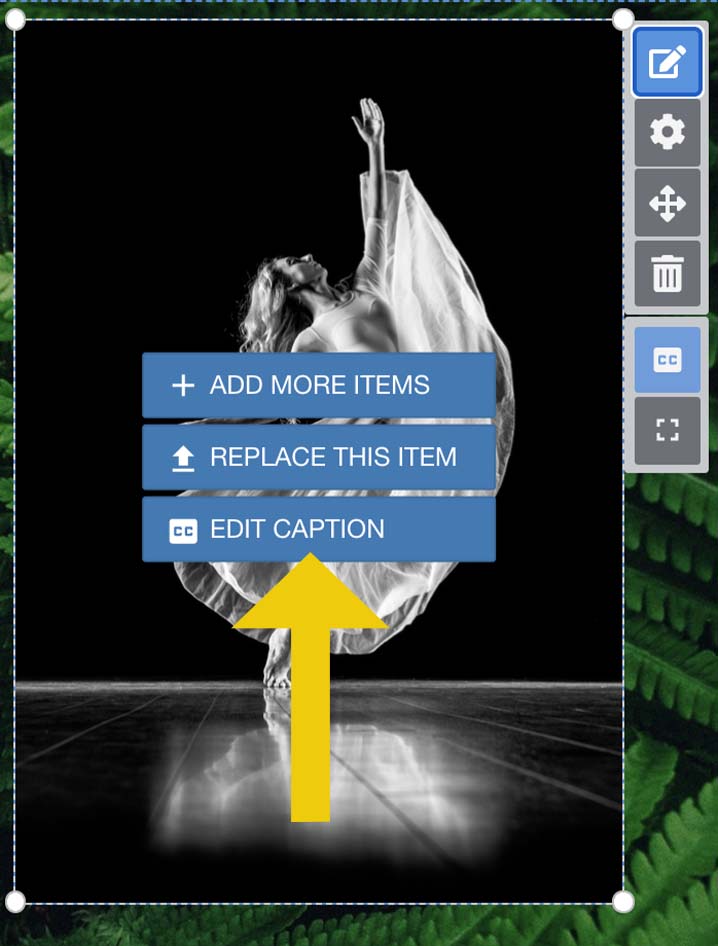 |
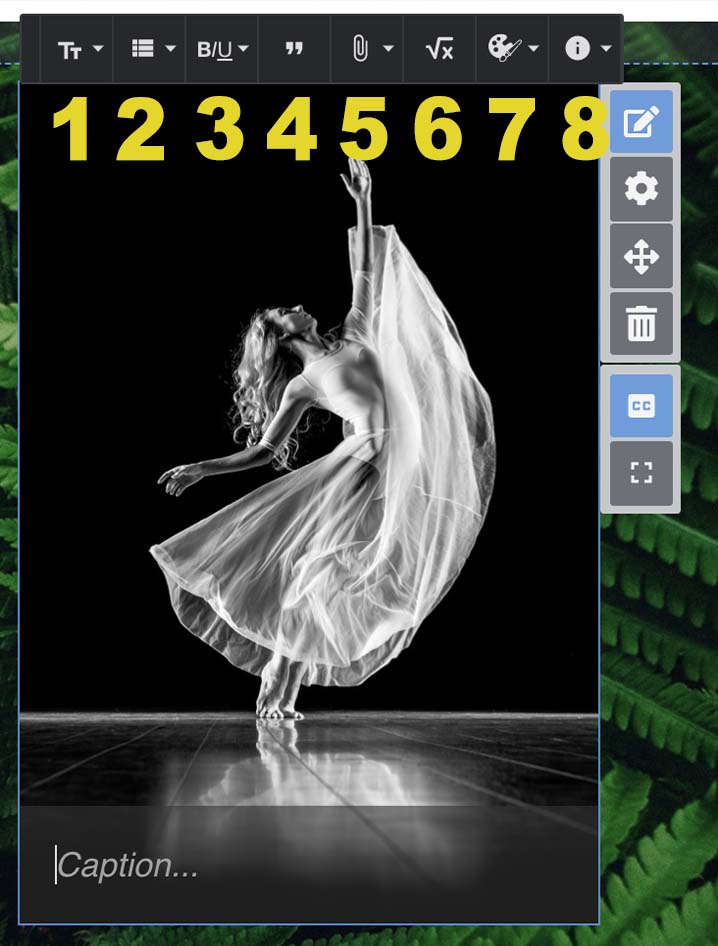
Step 4 | Clicking the edit button brings up a style box. From left to right, the buttons are:
|  |
Step 5 | Clicking on the word “caption” at the bottom of your photo will allow you to type your caption. | 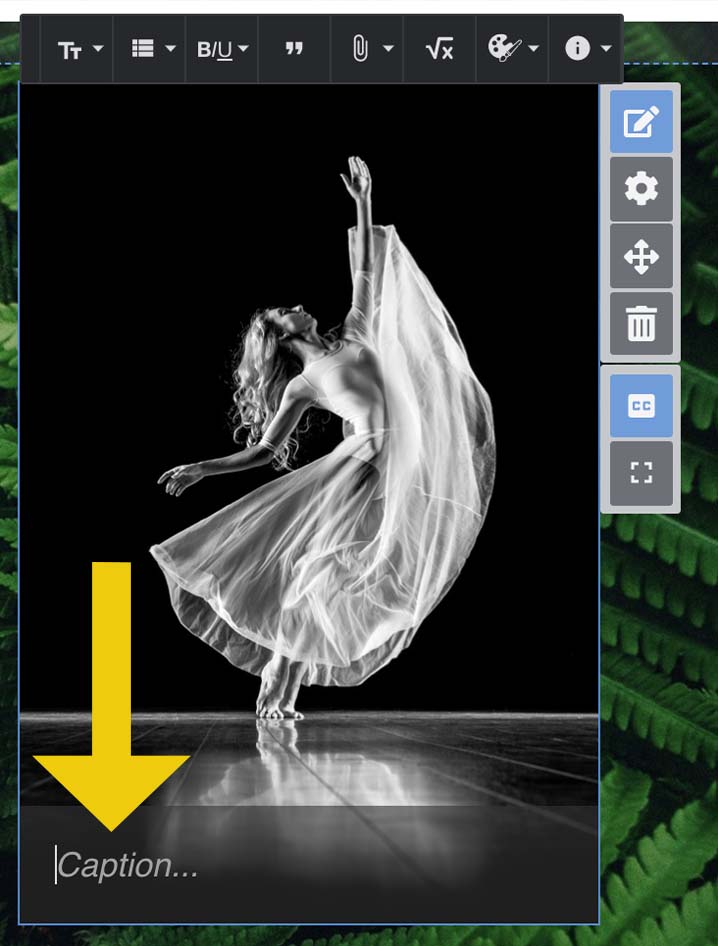 |
Step 6 | For additional caption editing tools, click on the Settings gear. | 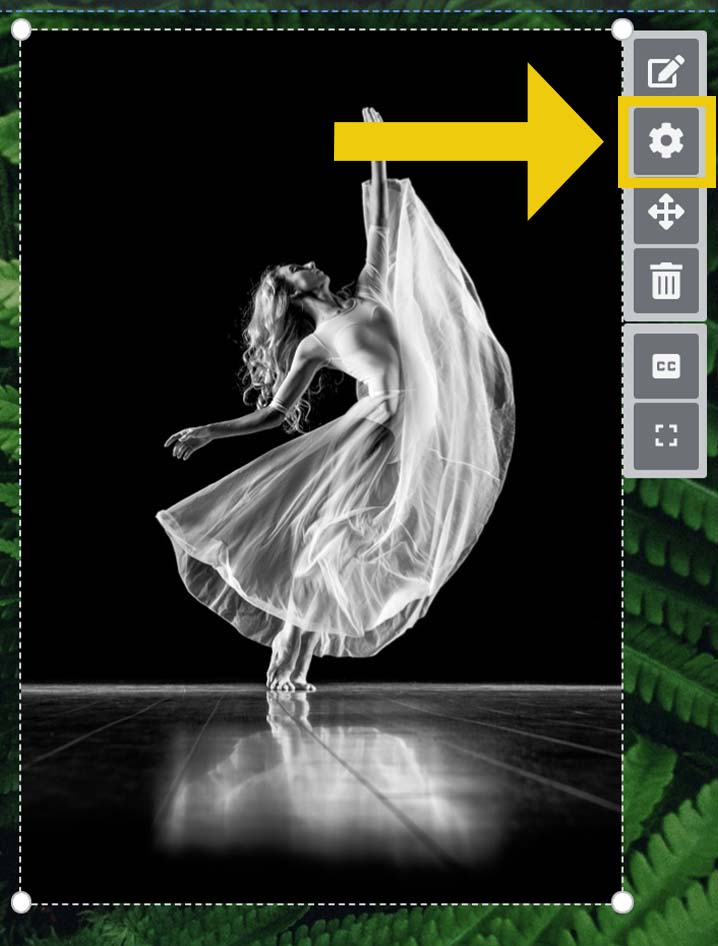 |
Step 7 | On the left of your screen, the image and caption editing panel will appear. You may have to scroll down to see Customize Styles. Here, you can edit the position of your caption on your image. | 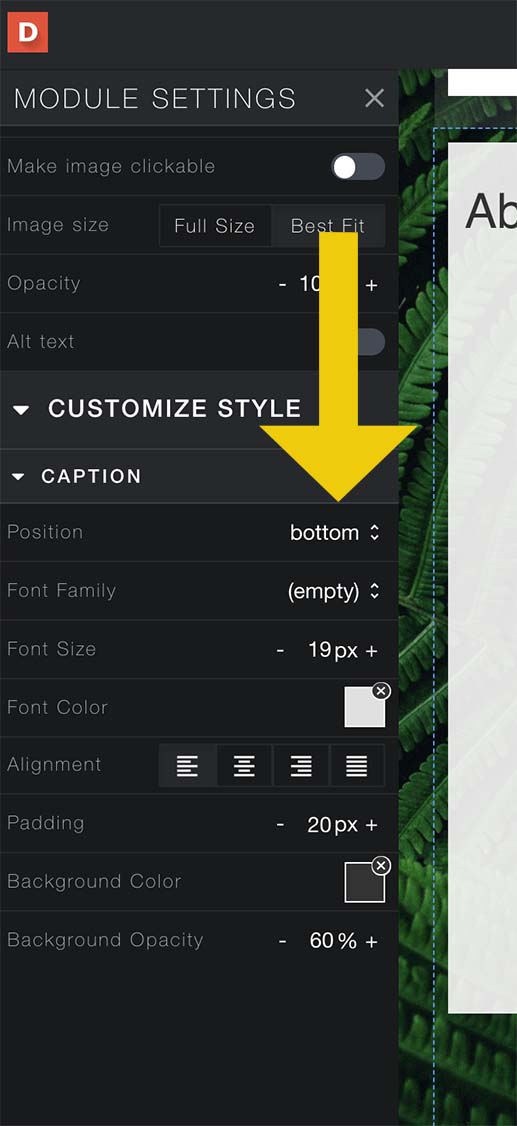 |
Step 8 | Next, you have your Font options. You can change the font of your caption by selecting a font from the drop-down menu. You can change your font size by either clicking the plus/minus signs or clicking on the number and dragging the white dot along the line. You can also change the color of your caption text by clicking on the box underneath color and selecting from the choices. | 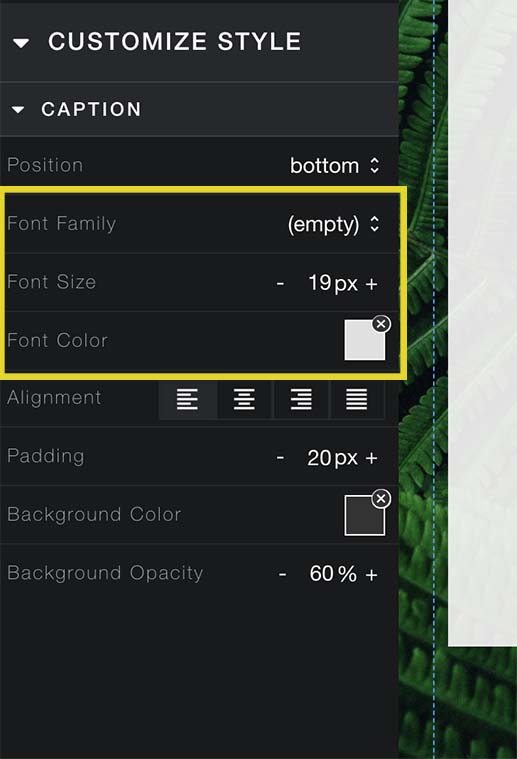 |
Step 9 | Here, you can choose the alignment of the text in your caption. | 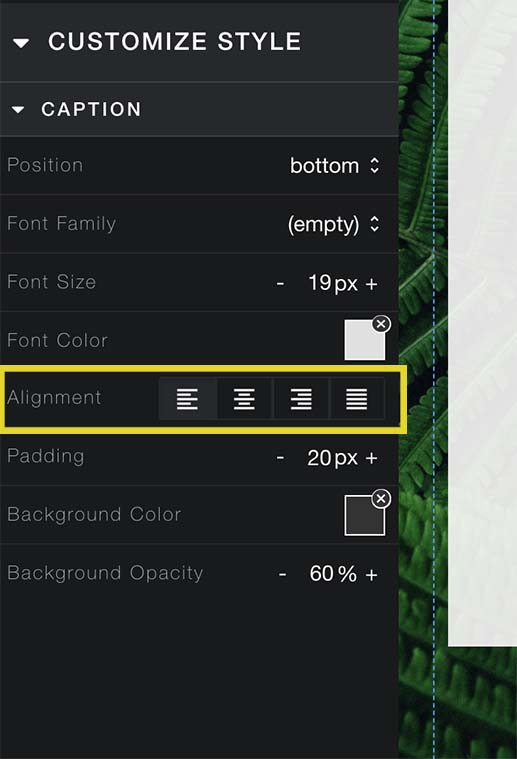 |
Step 10 | The padding tool allows you to change the amount of space around the text of the caption. | 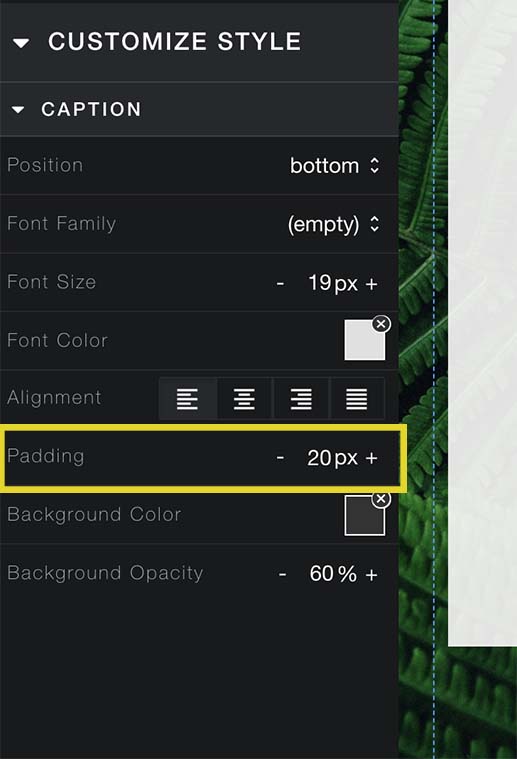 |
Step 11 | The background color and background opacity tools allow you to change the background color of your caption. It is a similar feature to the background of a slide. | 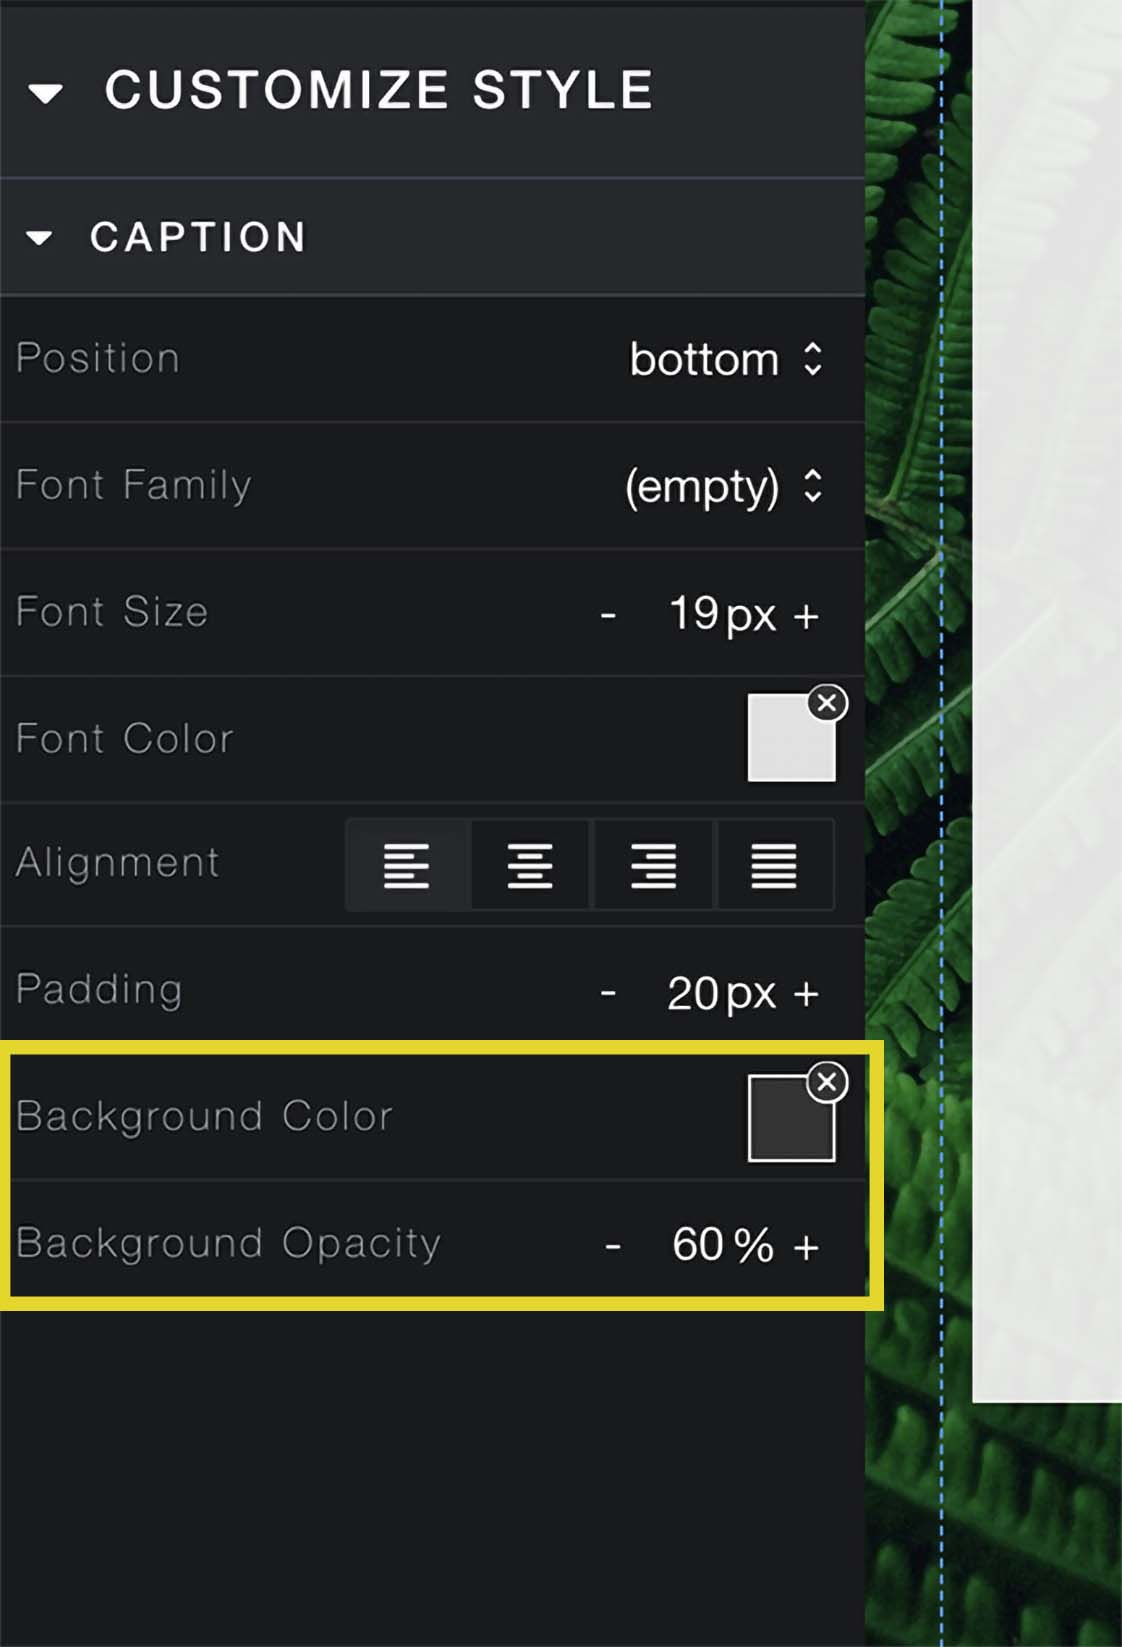 |
If you have additional questions, email us at aportfolio@appstate.edu