Step 1 | Once you have logged into Aportfolio, click on the Courses tab. |  |
|---|
Step 2 | Select the course in which you would like to create an assignment. |  |
|---|
Step 3 | Within the course tabs, select Assignments. | 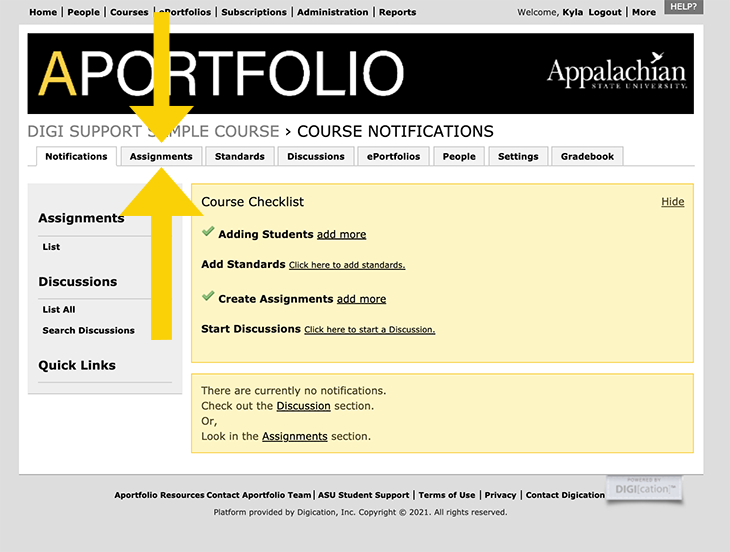 |
|---|
Step 4 | Here you can see all of the assignments that have been created in course. To create a new assignment, click Add Assignment. | 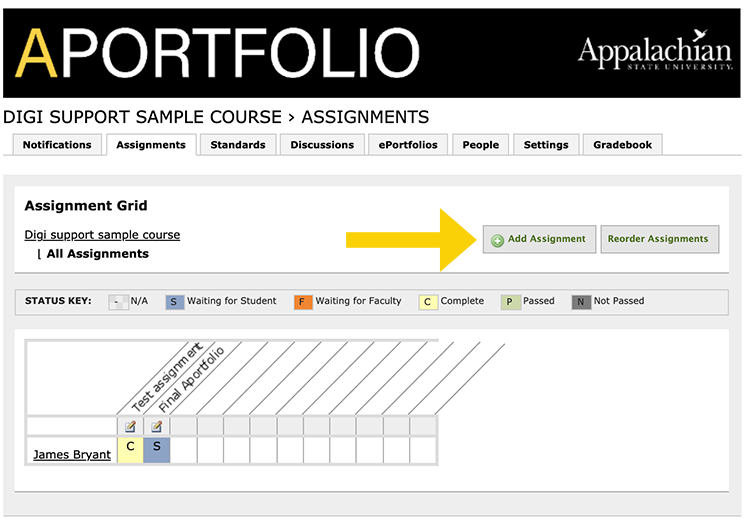 |
|---|
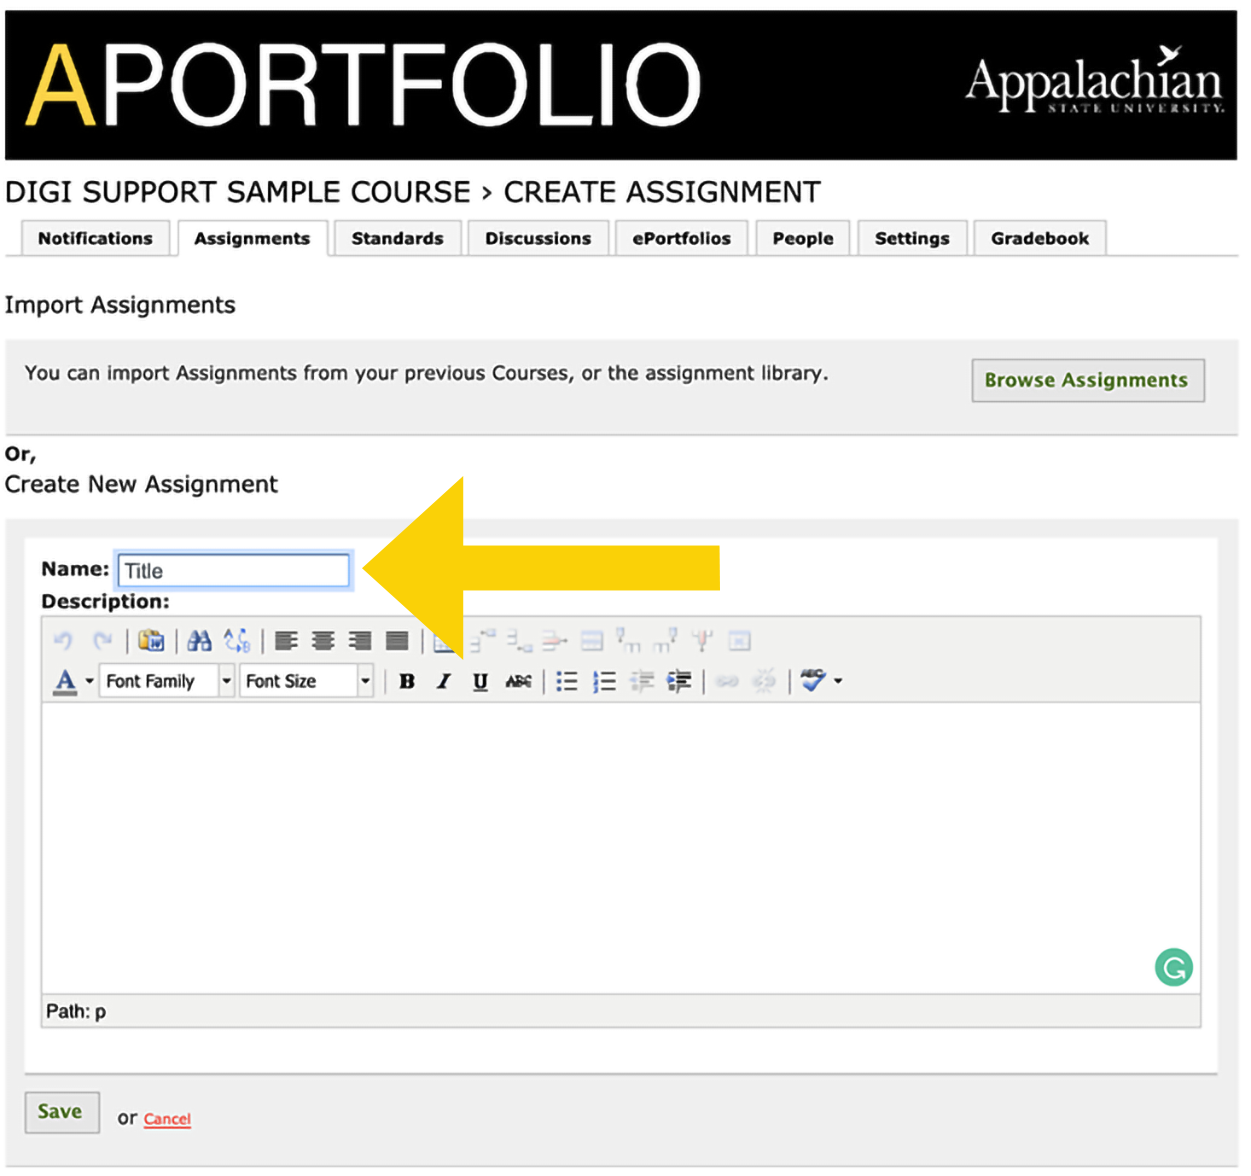
Step 5 | Start by giving your assignment a title.
NOTE: IT IS IMPORTANT TO ADD THE NAME OF YOUR COURSE IN THE ASSIGNMENT TITLE (example:RC 1000 Midterm) Student may have several courses with Aportfolio assignments and your course title will ensure they do not submit to the wrong course!)
|  |
|---|
Step 6 | Next, you can give the assignment a description. | 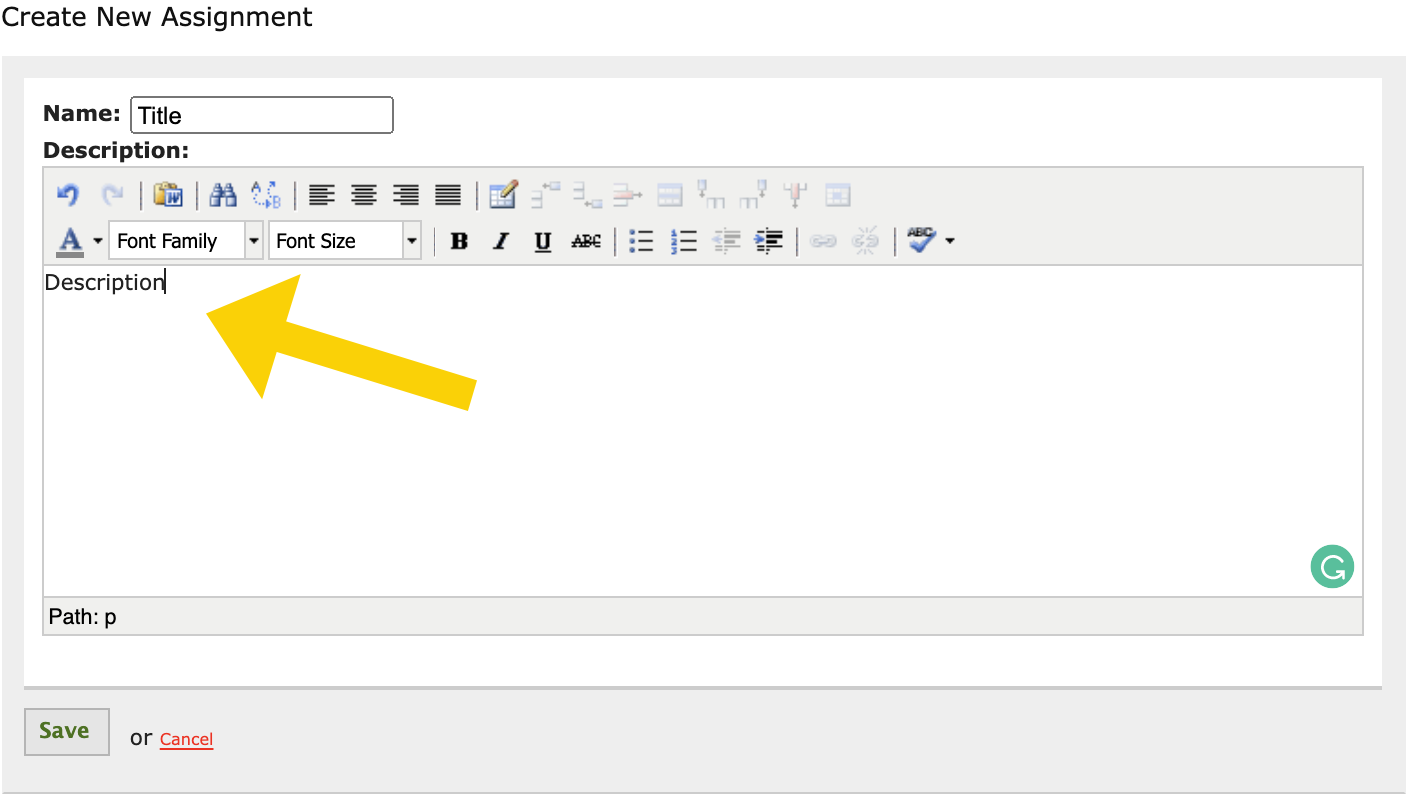 |
|---|
Step 7 | Once you are satisfied with the assignment title and description, click the green Save. | 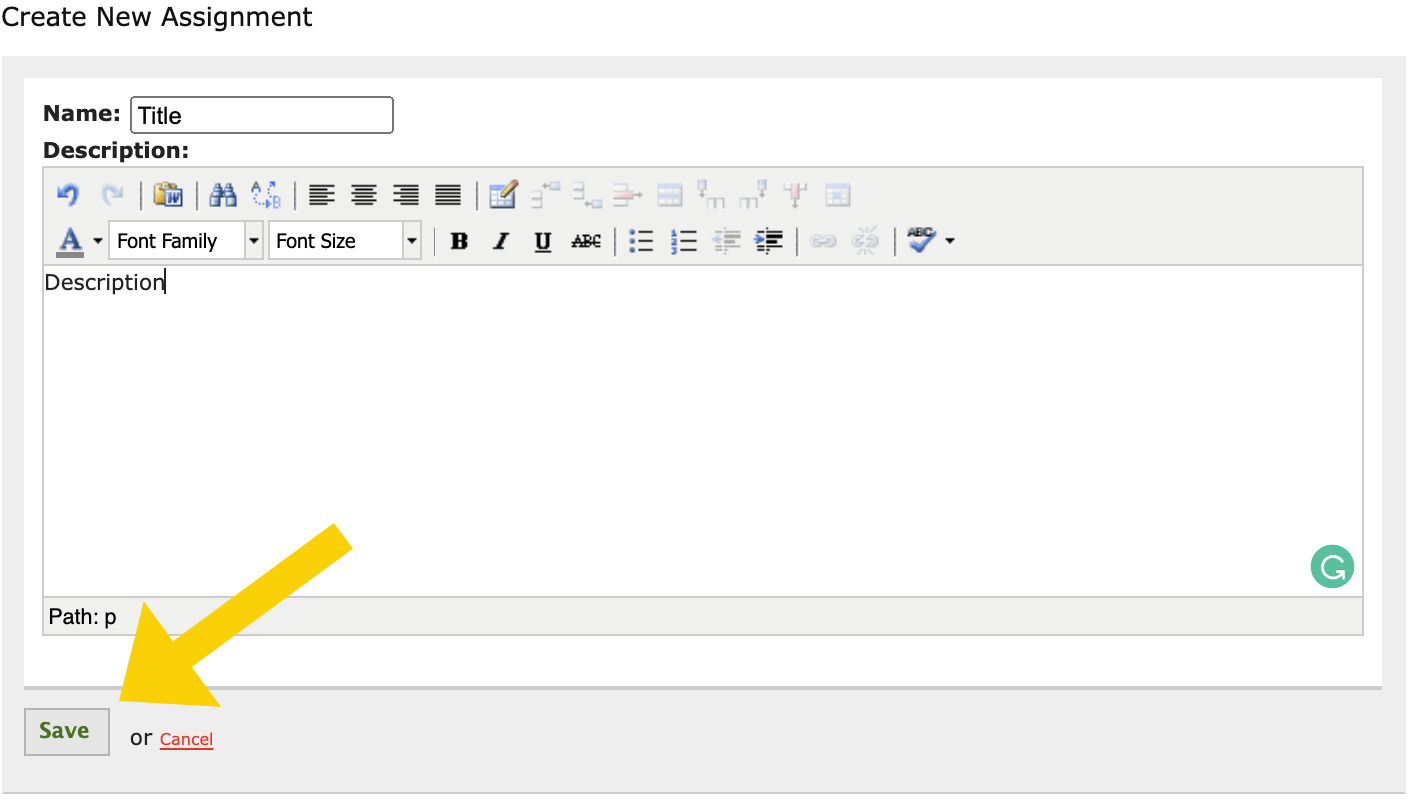 |
|---|
Step 8 | After you have created the assignment, you will need to be sure to add a step, by clicking the Add Step button. | 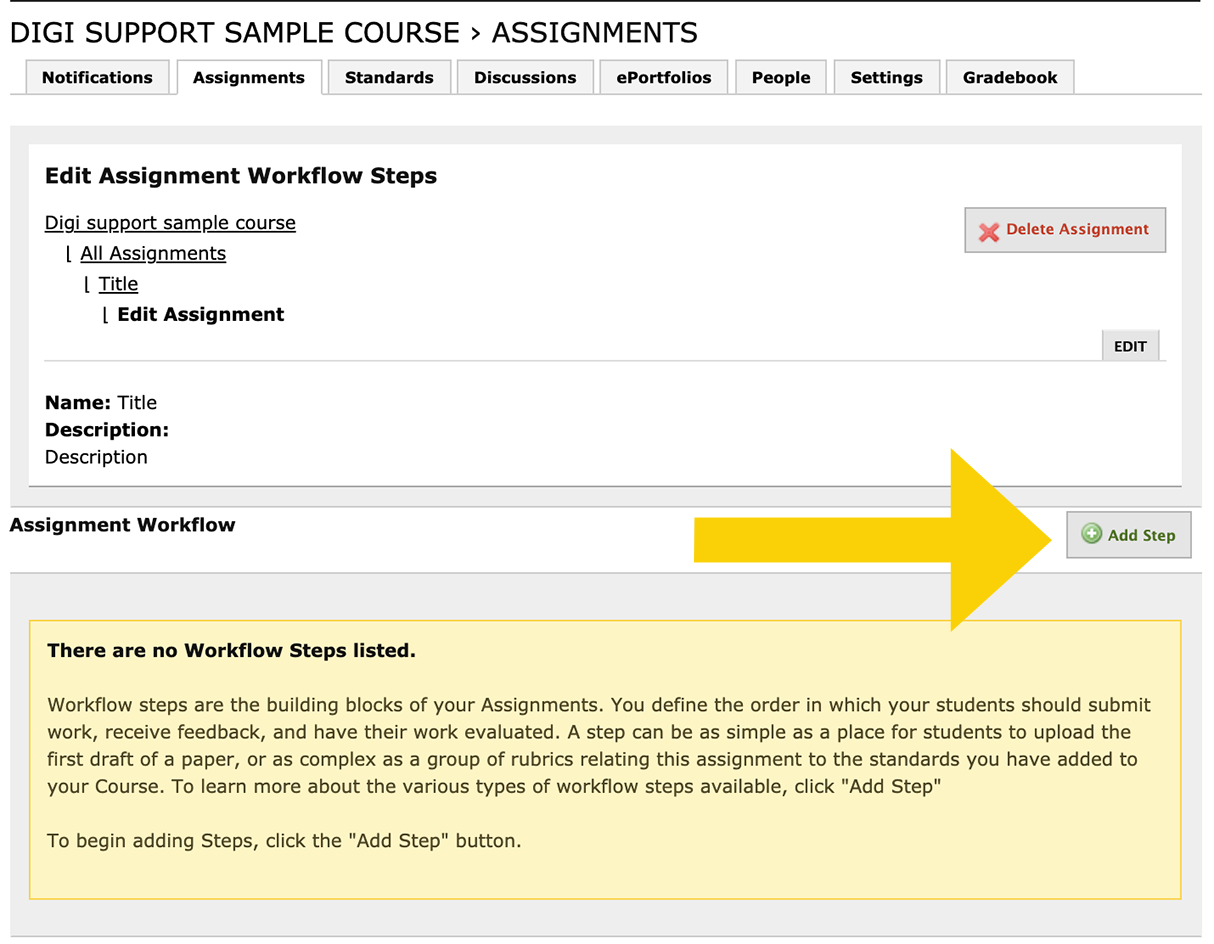 |
|---|
Step 9 | Select Evidence in the Add Step tabs. You must always add Evidence; it allows students to submit work for the assignment. | 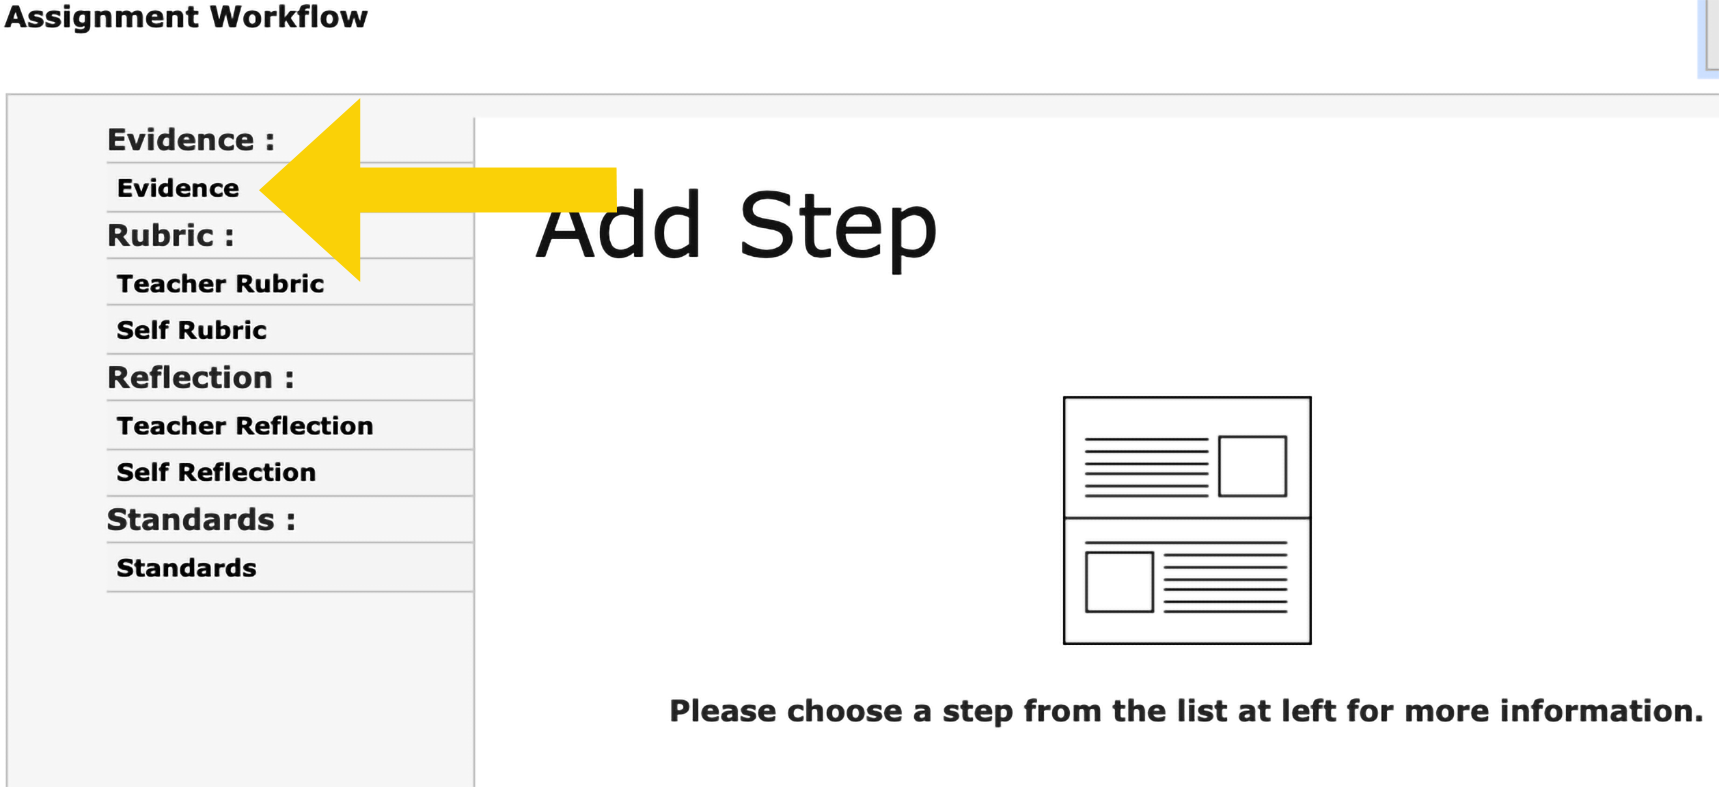 |
|---|
Step 10 | In the bottom right-hand corner, select Add This Step, to add Evidence to the assignment. | 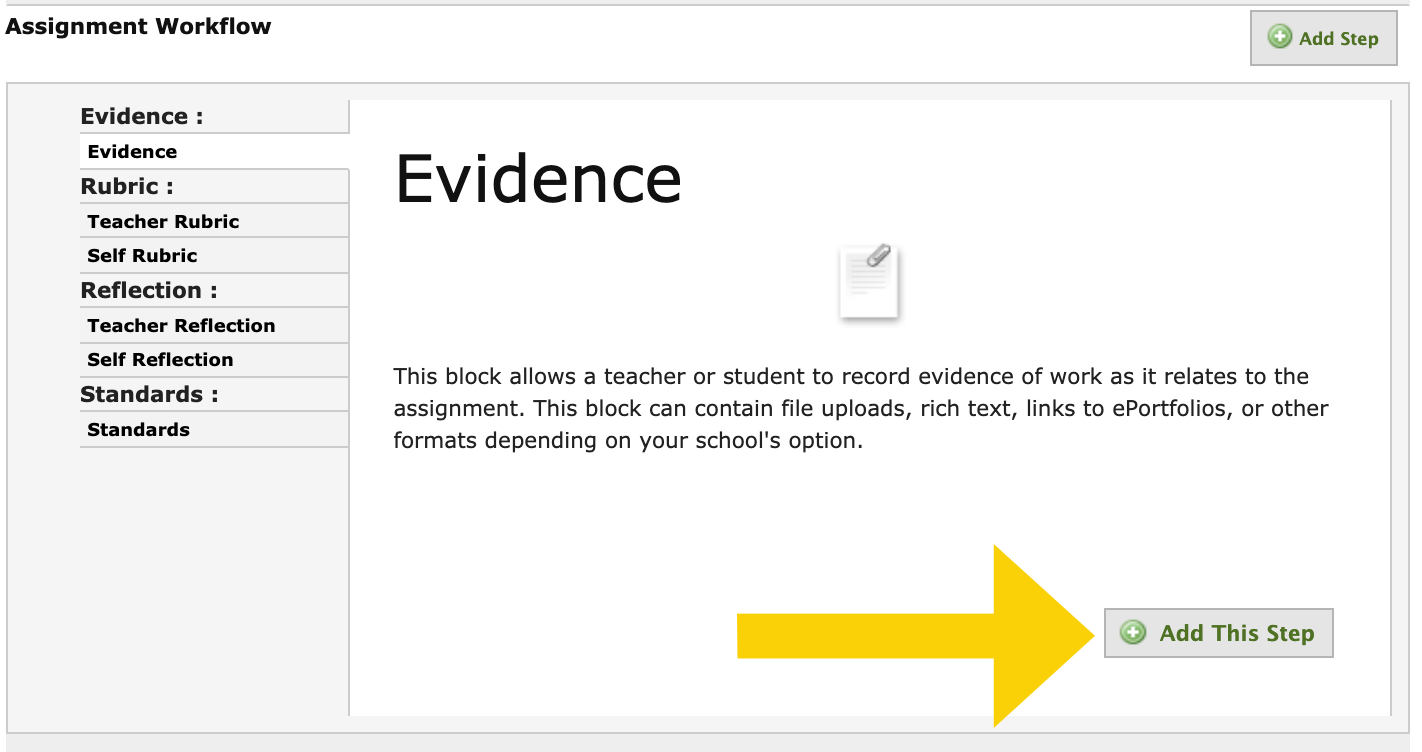 |
|---|
Step 11 | Here, under Basic Information, you can give the evidence a title and add a description, if you so desire. | 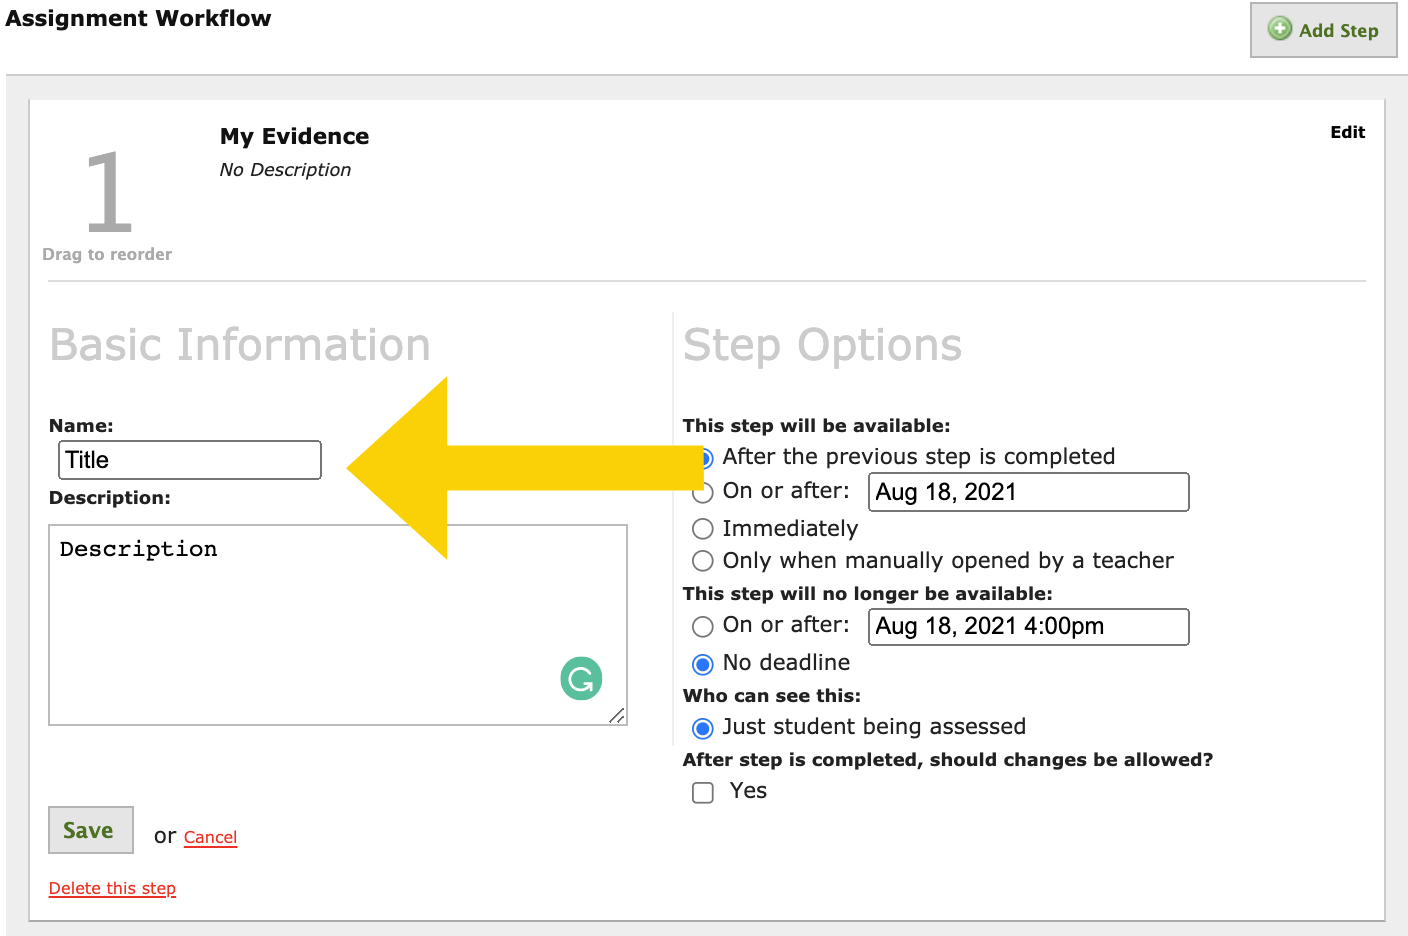 |
|---|
Step 12 | Beside the Basic Information, you will find Step Options. This is where you can edit the dates to make the assignment available at a specific time and include a deadline for the assignment. This is where you can also edit who will be able to see this step and if you want to allow changes to be made after the step is completed. | 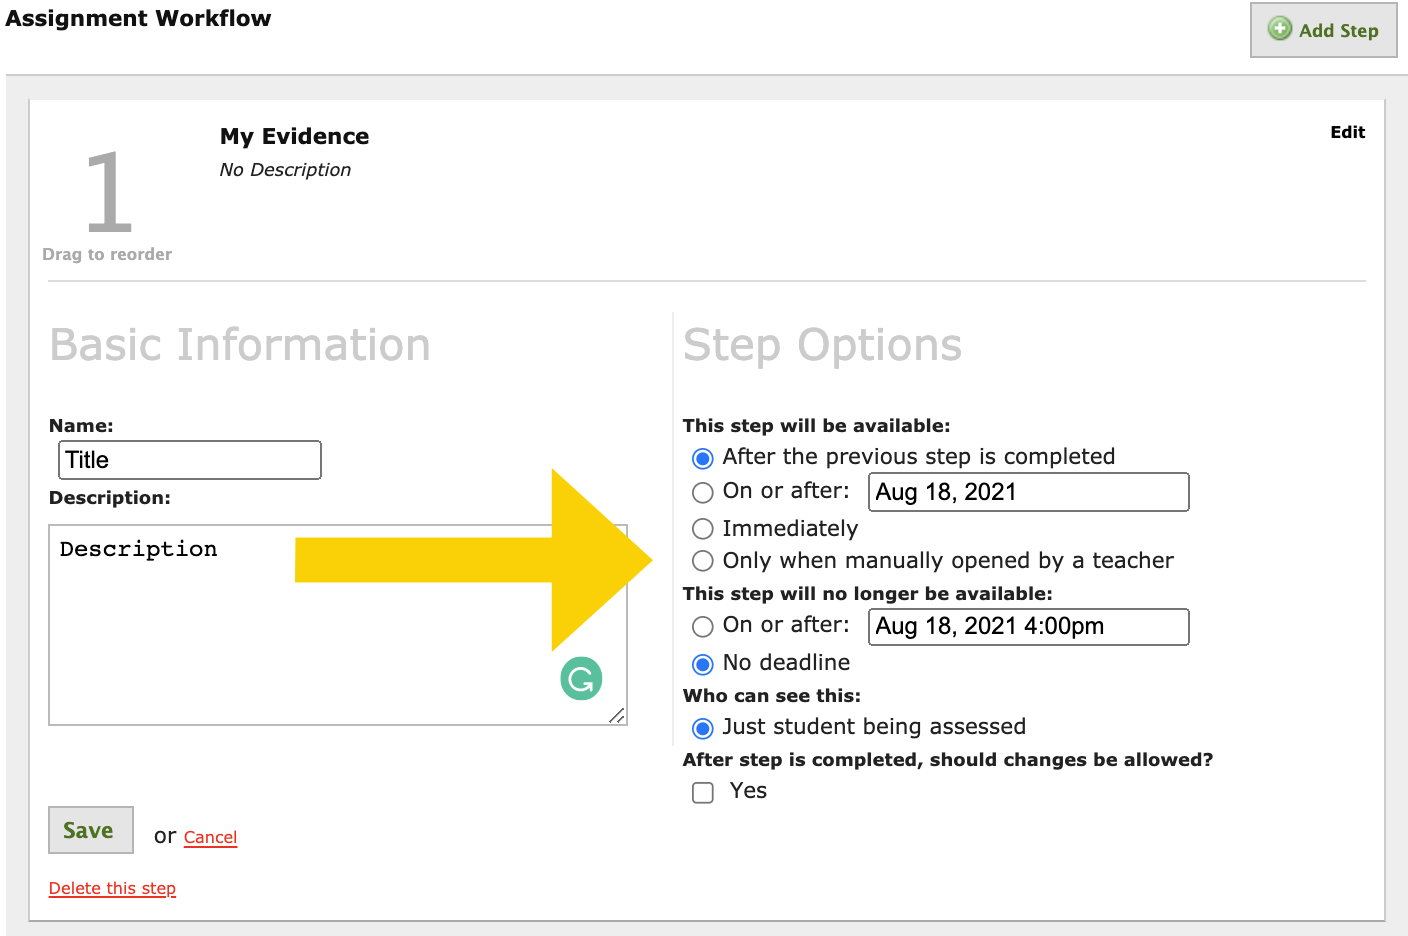 |
|---|
Step 13 | Once you have made all of your changes, be sure to click Save in the bottom left-hand corner of the page. | 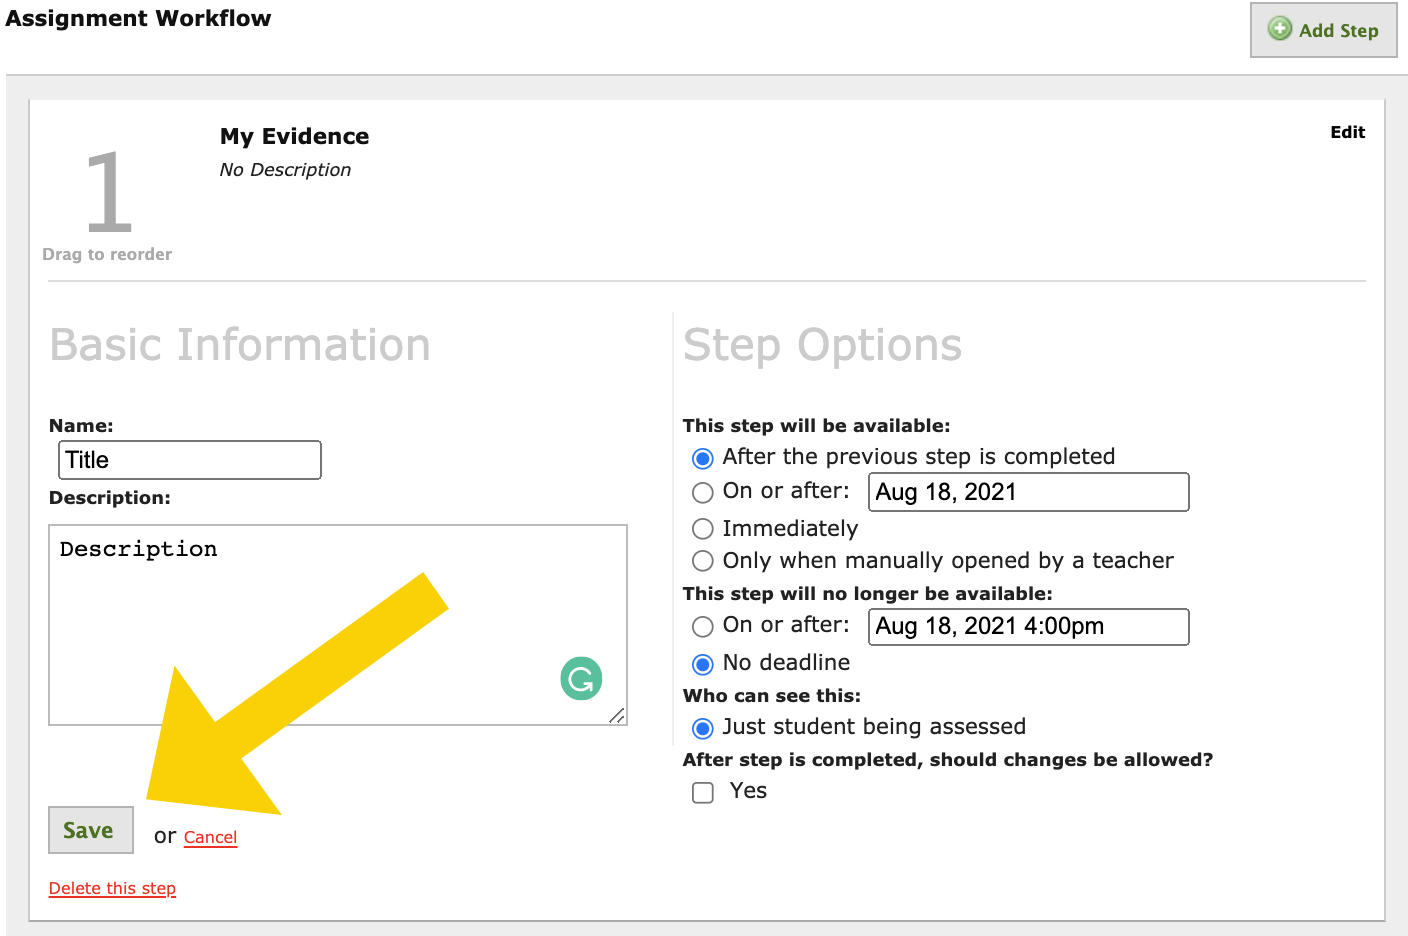 |
|---|